
CONFIGURE OUTLOOK EXPRESS FOR YAHOO ACCOUNT
o you want to read and send your Yahoo! email with Outlook Express? If you are a Yahoo! Mail Plus user you can. Here’s how to set up Outlook Express to read and send Yahoo! Mail Plus:
Troubleshooting tips
If you still can’t send Yahoo! Mail from Outlook Express, you might be accessing the Internet through an ISP that is blocking the SMTP port. If this is the case, try using port 587 when sending email via Yahoo!'s SMTP server. To change the port to 587:
- From the Tools menu, select Accounts.
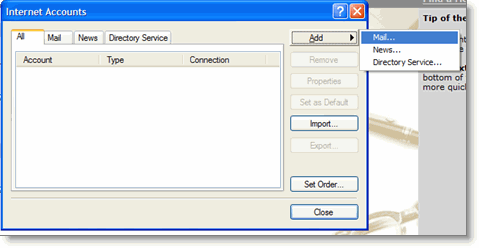
- Select the Mail tab. Click Add > Mail. This starts the Internet Connection Wizard.
- In the Internet Connection Wizard, type your name as want it to appear when you send an email message, and then click Next.
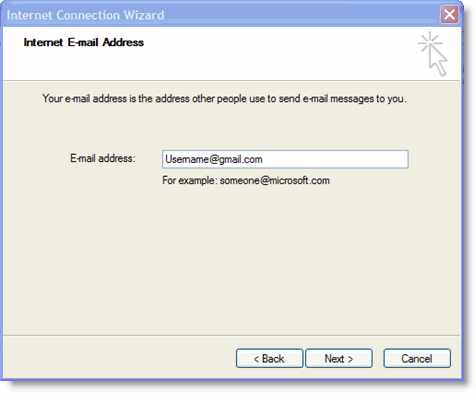
- In the E-Mail address box, type your Yahoo! Mail Plus email address (for example, testing80@yahoo.com), and then click Next.
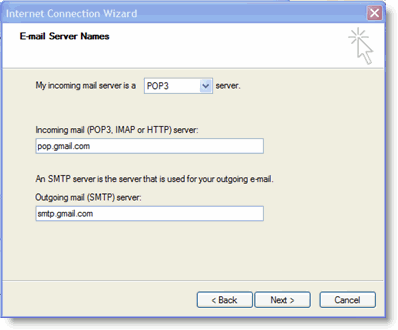
- In the E-Mail Server Names fields:
- My Incoming mail server is a: Select POP3 from the pull-down menu.
- Incoming mail (POP3, IMAP, or HTTP) server: Typeplus.pop.mail.yahoo.com.
- Outgoing mail (SMTP) server:[/b] Type plus.smtp.mail.yahoo.com.
Click Next. - In the Internet Mail Logon fields:
- Account Name: Type your Yahoo! ID (your email address without the "@yahoo.com").
- Password: Type your Yahoo! password.
- Select the Remember Password checkbox if you don't want Outlook Express to prompt you for your password each time you check your mail.
- Do not select the Log on using Secure checkbox.
- Click Finish to save your account and exit the wizard.
- The Yahoo! Mail outgoing mail server requires authentication. To turn this on, underAccount, select plus.pop.mail.yahoo.com and then click Properties. A properties dialog box for the account appears.
- Click the Servers tab. Under Outgoing Mail Server, select the My server requires authentication checkbox.
- Click the Advanced tab.
- Under Outgoing Mail Server (SMTP), select the This server requires a secure connection (SSL) checkbox.
- In the Outgoing mail (SMTP) field, type 465 for the port number.
- Under Incoming mail (POP3), select the This server requires a secure connection (SSL) checkbox. The port number in the Incoming mail (POP3) field usually changes automatically from 110 to 995. If it doesn’t, type 995 for the port number.
- Click OK to save your settings.
- Click Close to close the Internet Accounts dialog box.


Troubleshooting tips
If you still can’t send Yahoo! Mail from Outlook Express, you might be accessing the Internet through an ISP that is blocking the SMTP port. If this is the case, try using port 587 when sending email via Yahoo!'s SMTP server. To change the port to 587:
- From the Tools menu, select Accounts. The Internet Accounts dialog box appears.
- Click Mail, select plus.pop.mail.yahoo.com, and then click Properties.
- Click the Advanced tab. In the Outgoing mail (SMTP) box, type 587.
- Click Apply, and then click OK to close the Internet E-mail Settings dialog box.
- Click Close to close the Account Settings dialog box.


CONFIGURE OUTLOOK EXPRESS FOR GMAIL ACCOUNT
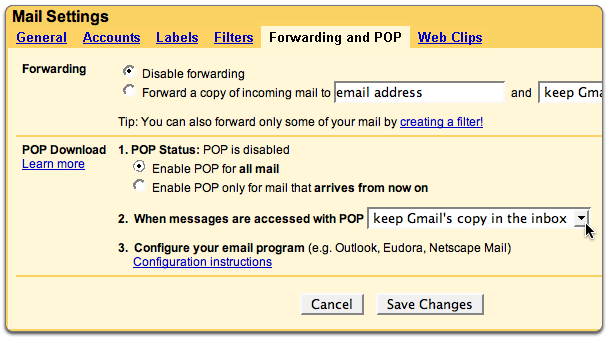
1 Enable pop in Gmail.
Enabling POP You can retrieve your Gmail messages with a client or device that supports POP, like Microsoft Outlook or Netscape Mail.
To enable POP in Gmail:
2 .configure Outlook Express to work with Gmail:
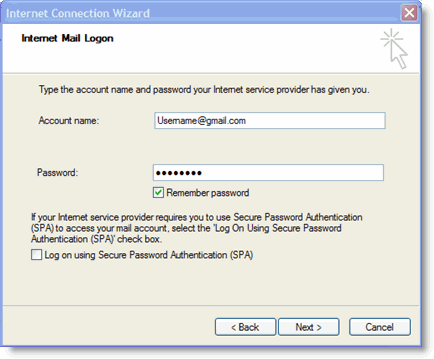
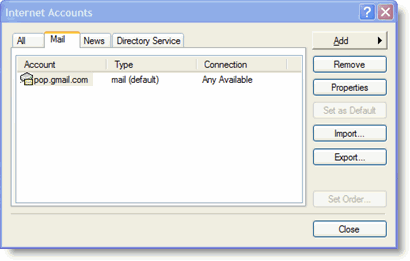
- Check the box next to This server requires a secure connection (SSL) underOutgoing Mail (SMTP) .
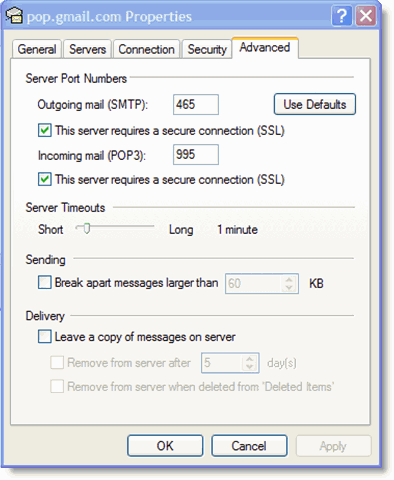
- Enter 465 in the Outgoing mail (SMTP): field.
- Under Outgoing Mail (SMTP) , check the box next to This server requires a secure connection (SSL) .
- Under Incoming mail (POP3) , check the box next to This server requires a secure connection (SSL) . The port will change to 995 .
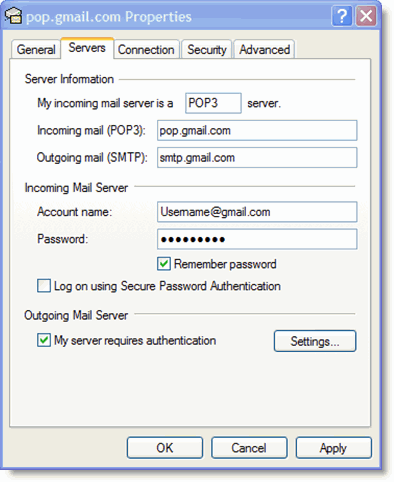

No comments:
Post a Comment